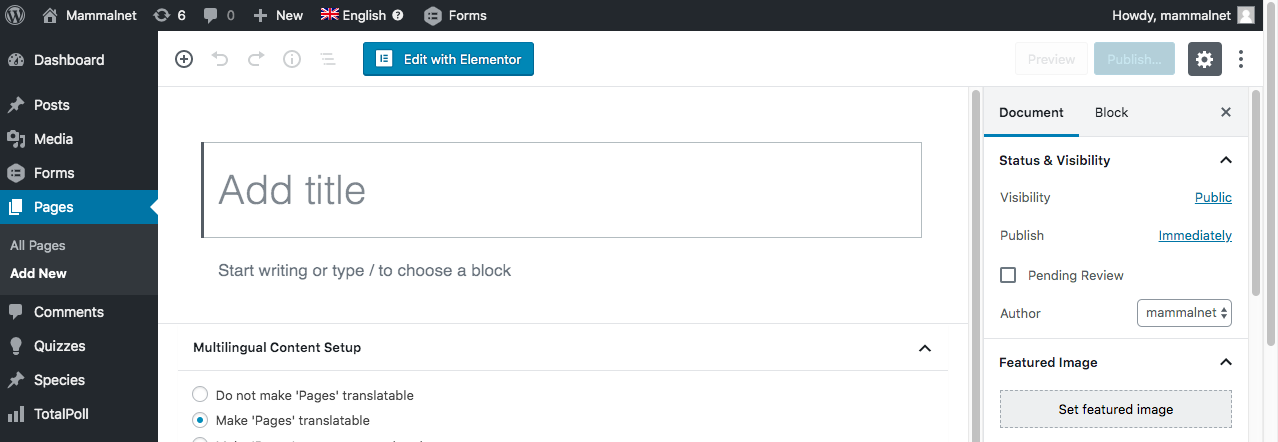
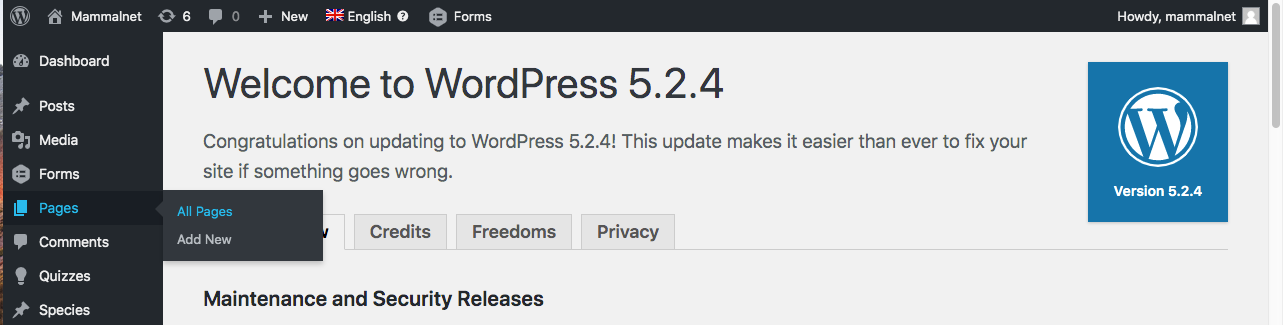
Once you have entered in your Desktop, you can see a series of options in the left sidebar. If we move the cursor over pages, then the All Pages and Add New options will be displayed.
If we want is to create a new page, we select the option Add New. The following will appear:
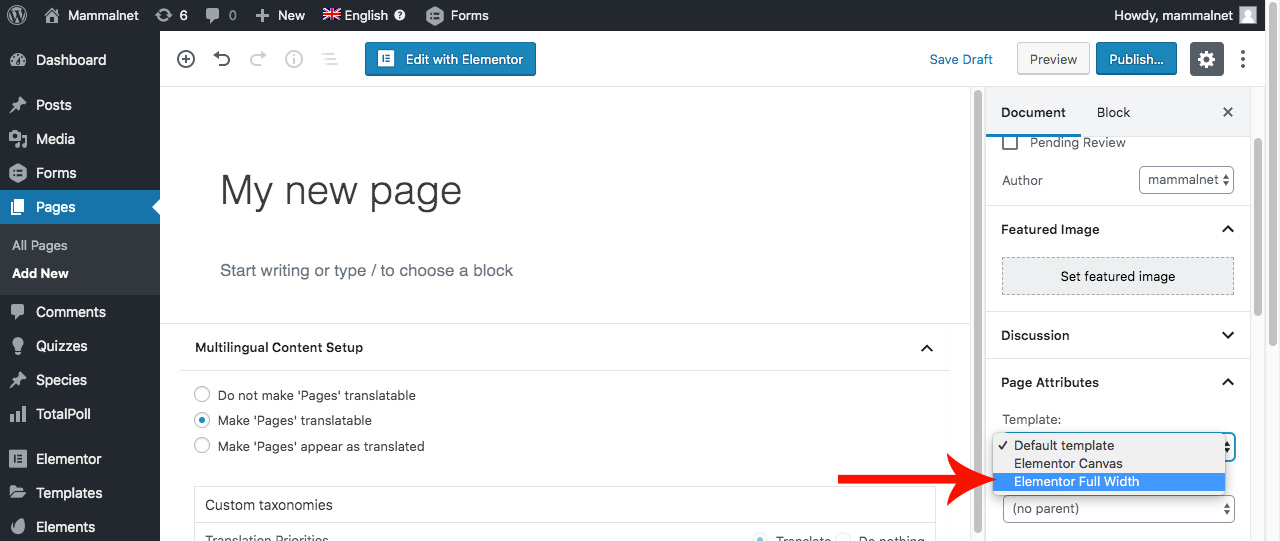
The first thing we have to do is introduce the title of our new page in the upper block. Once with the title, in the right sidebar, in the Page Attributes/Template tab, we have to select the Elementor Full Width option.
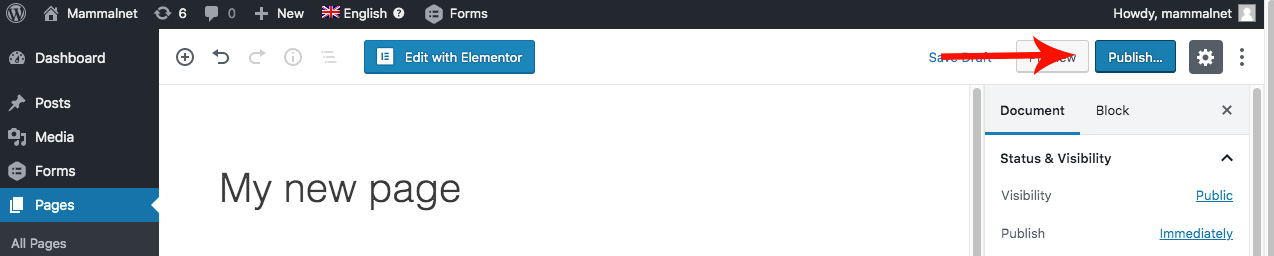
Once we have selected those options, we must click on Publish, which is located in the right sidebar.
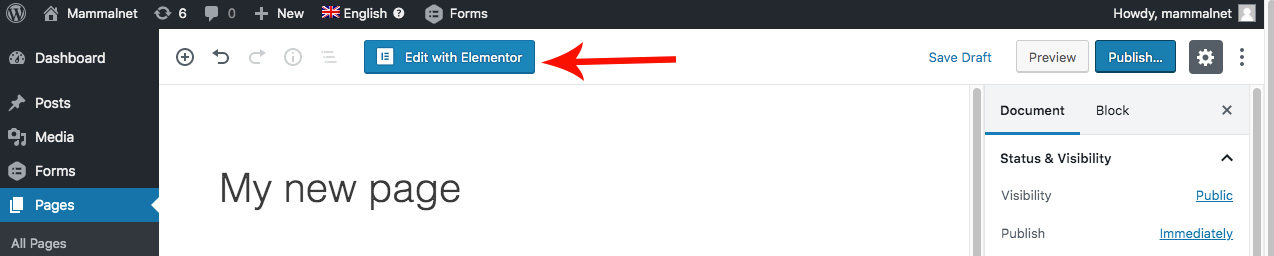
When we have our page published, we only have to edit with Elementor, so we give the button Edit with Elementor.
2.- How to edit images and texts
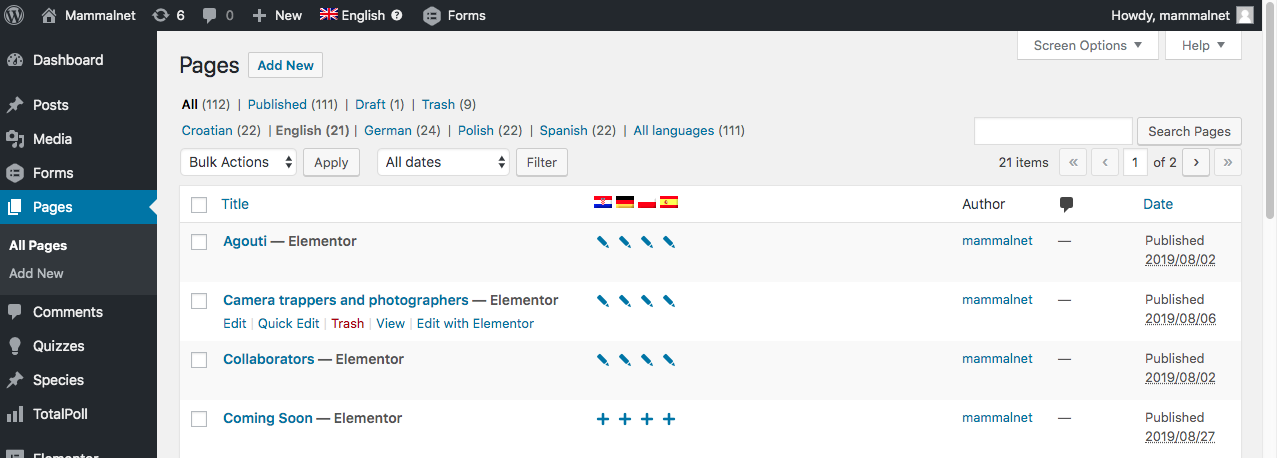
The first thing to do is to go to the page where you want to edit the text. There are two ways to do them, the first is to go to the Pages/All Pages section (located in the sidebar)
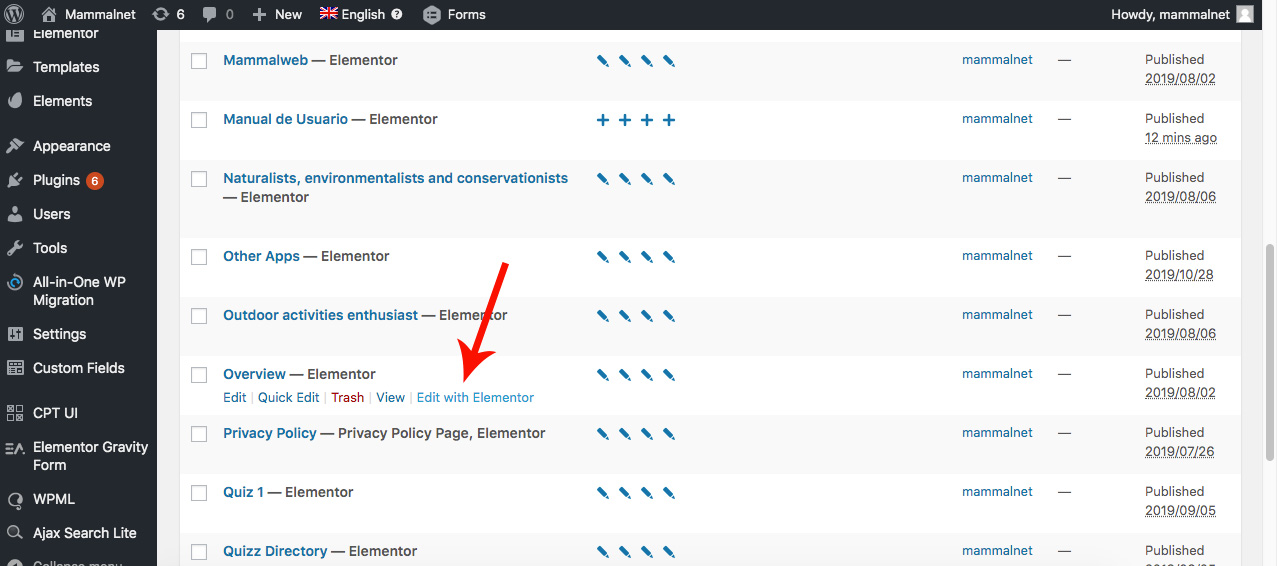
Once we click on it, we will see a list of all the pages that our web contains. We select the one that contains the text that we want to edit (for the following example, we have chosen the page Overview) and we select the option Edit with Elementor.
The other way, which is much faster and more direct, is to press Visit Site on the top bar of our WordPress menu:
Once we click there, we’ll see our website as it is. To edit the desired page you want, click on it (in our case onOverview) and look at the black top bar.
Of all the options we have, we press the option Edit with Elementor.
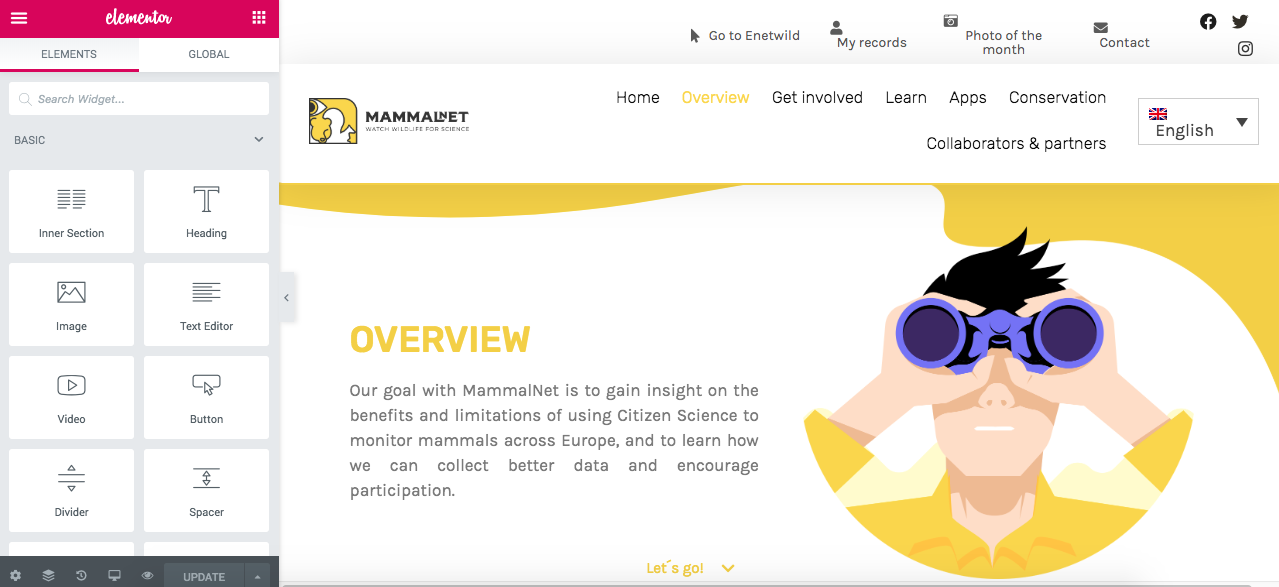
As you can see, in both ways we get to the editing mode of our pages.
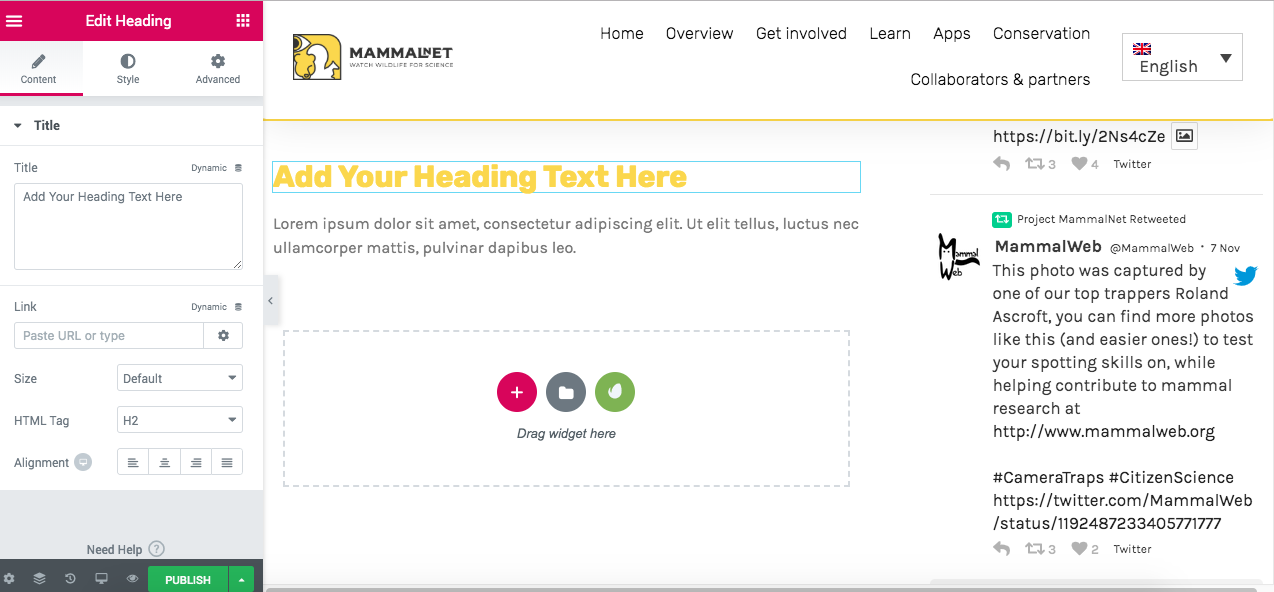
In edit mode, if we want to change a text, the only thing we have to do is to click on it, and automatically, will appear selected the section of text that we have clicked on the left side of our monitor.
Any changes you want to make must be made in the text box on the left. Once modified, we will see that the Update button at the bottom has changed to green. In order for the changes to be saved, we must press this button.
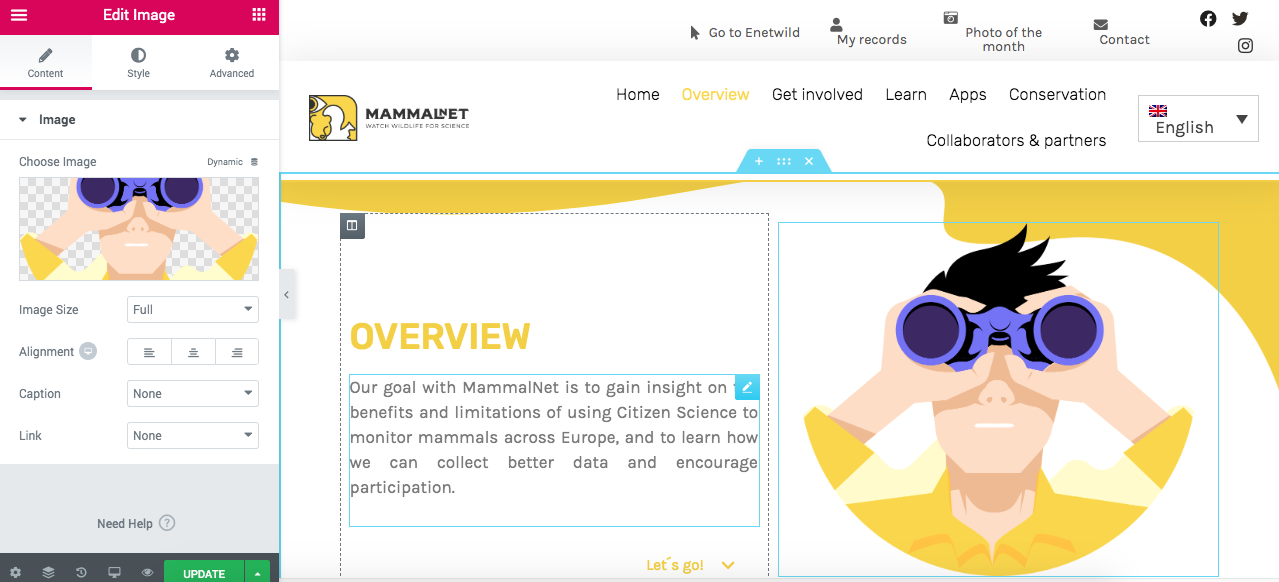
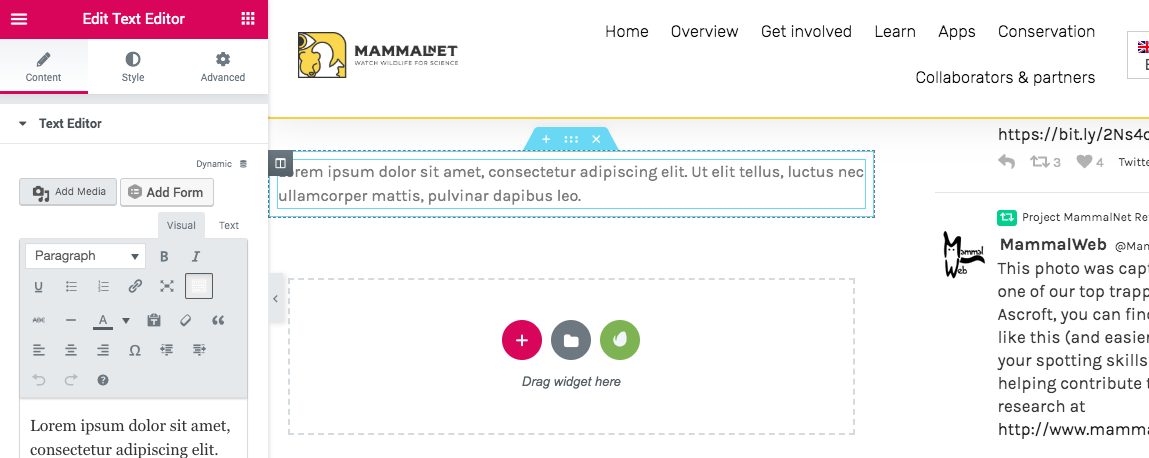
We have already seen how to modify a text, now we are going to see how to do the same with an image.
As with text, the first thing we have to do is click on the image we want to modify.
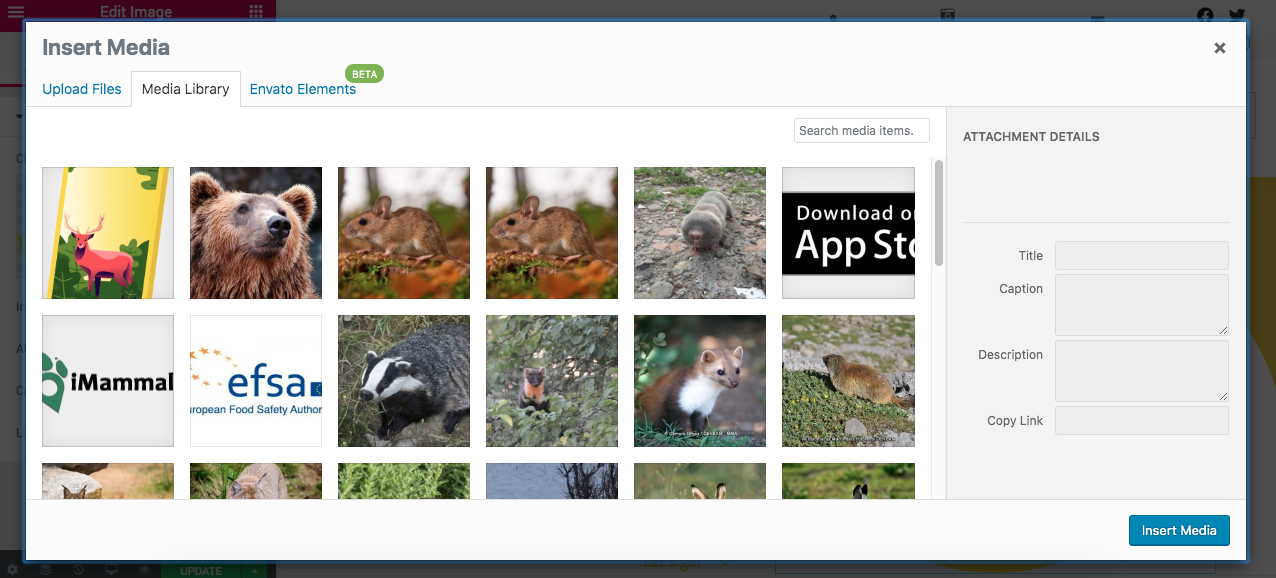
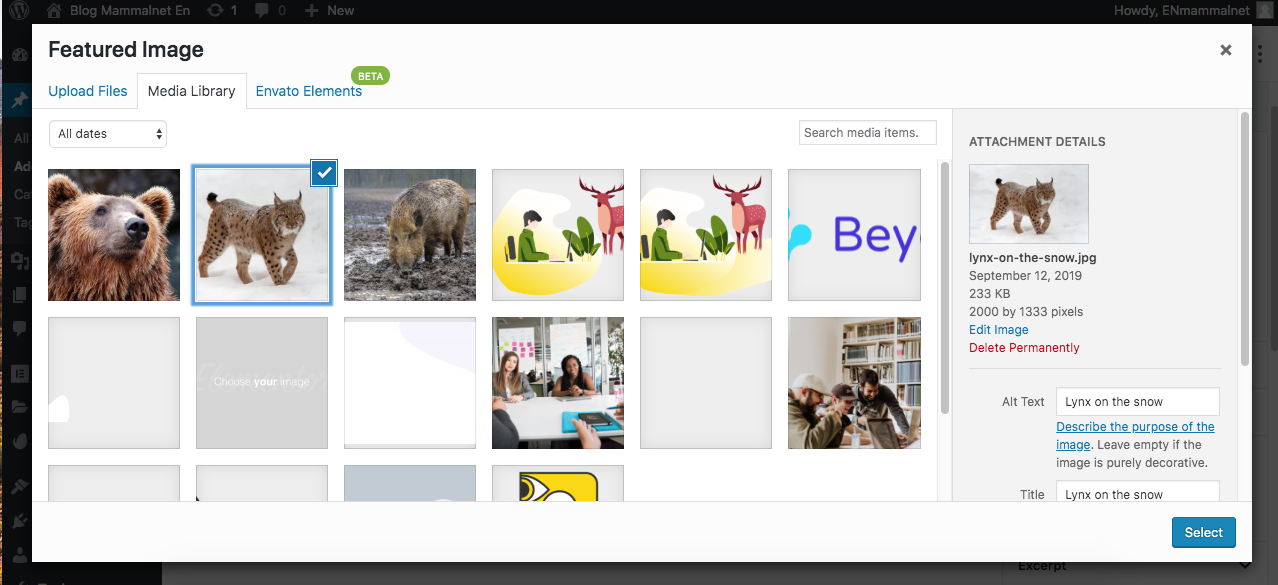
On the left side where we previously had the option to modify the text, there is now a thumbnail of our image. Click on the thumbnail on the left and then our Media Library will appear ( where all the images we have uploaded to our website can be found)
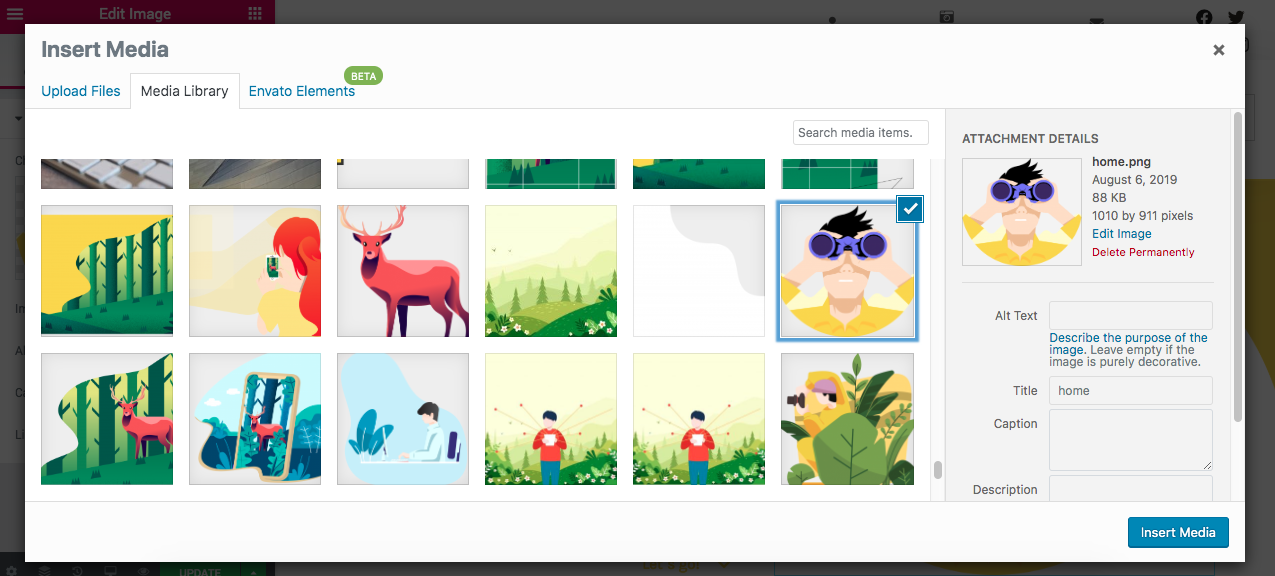
If the image that we want to put is already uploaded, we only have to select it. If we want to put a new image that is not in our media library, we must select the Upload Files option that is in the upper left part, just above the images.
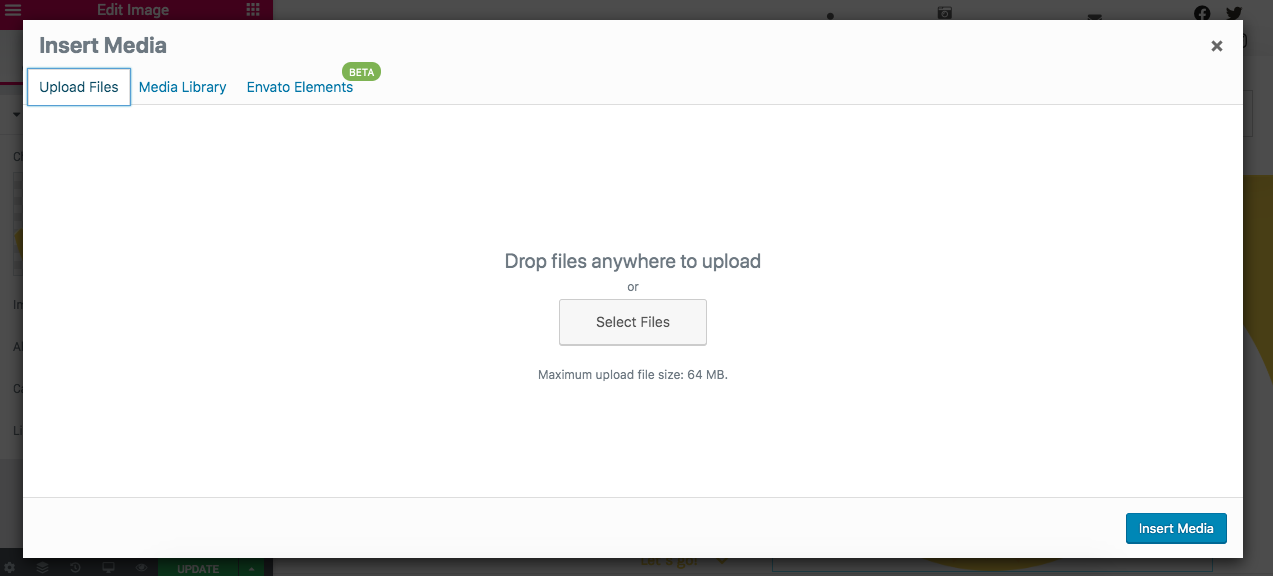
Once we click on it, the following will appear:
To upload a file, we can search for it on our computer by pressing Select Files or we can simply drag the image. Once we have the image we want to use (either one that was already uploaded or one that was just uploaded), we select it and see how its thumbnail appears to our right. We press the Insert Media button and we would have our image changed.
IMPORTANT! Always you make changes are made to the English version, the pages in the other languages must be updated so that the changes can be seen on the pages of the other languages.
3.- How to translate a page or edit a translation
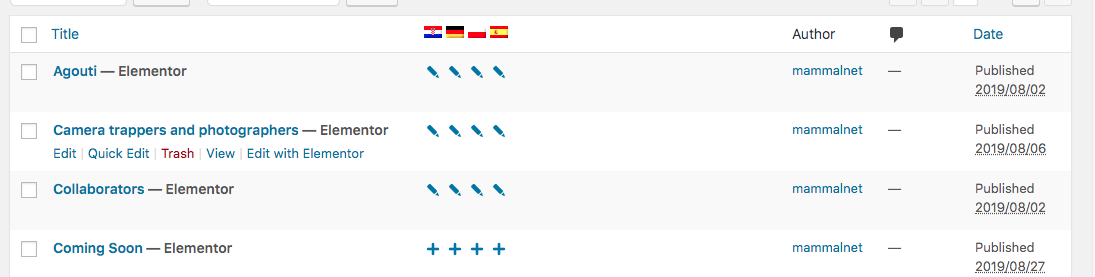
The first thing we have to do to translate a page, is to go to All Pages
Once there, we can notice that there are several flags at the top of the box where all the pages are. Each flag corresponds to a language. Underneath the flag in the line of each page appears the icon of a pencil that is for edit or the icon of + that is to add the translation.
VERY IMPORTANT! When you make changes in the translations, keep in mind that you must be in the English version, so make sure that the British flag is on the top line.
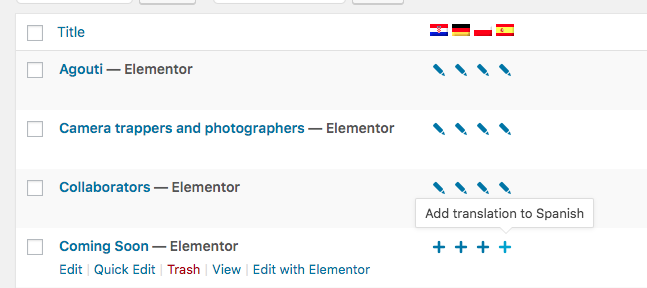
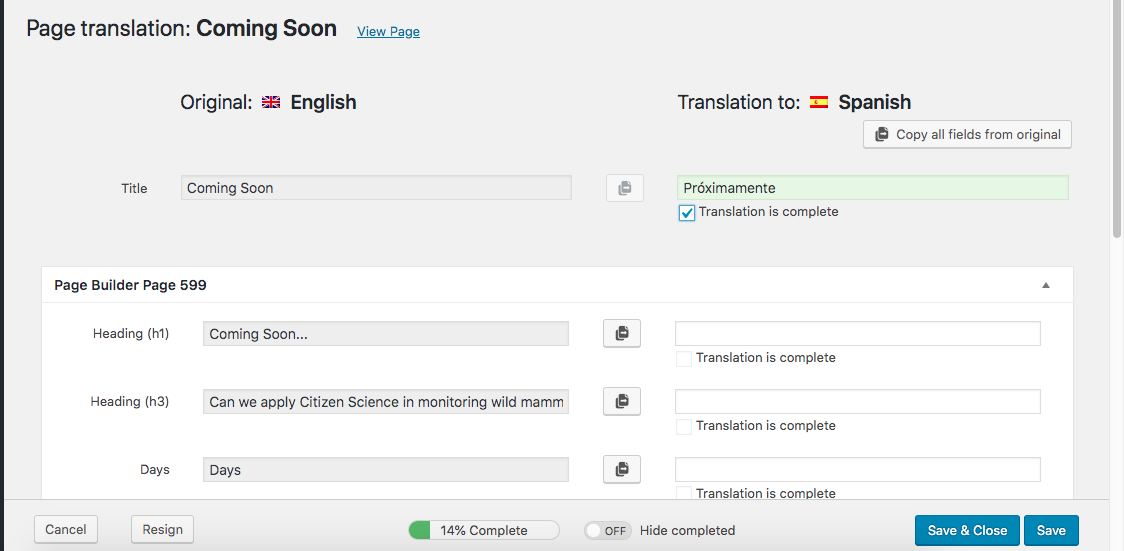
Let’s start by making a translation using the Comming Soon page, which, as we can see, has the + (add) symbol in all 4 languages.
Click on the + symbol in the language to which you want to add the translation. in this example, we will do the Spanish translation. Therefore, click on the + of the Spanish flag.
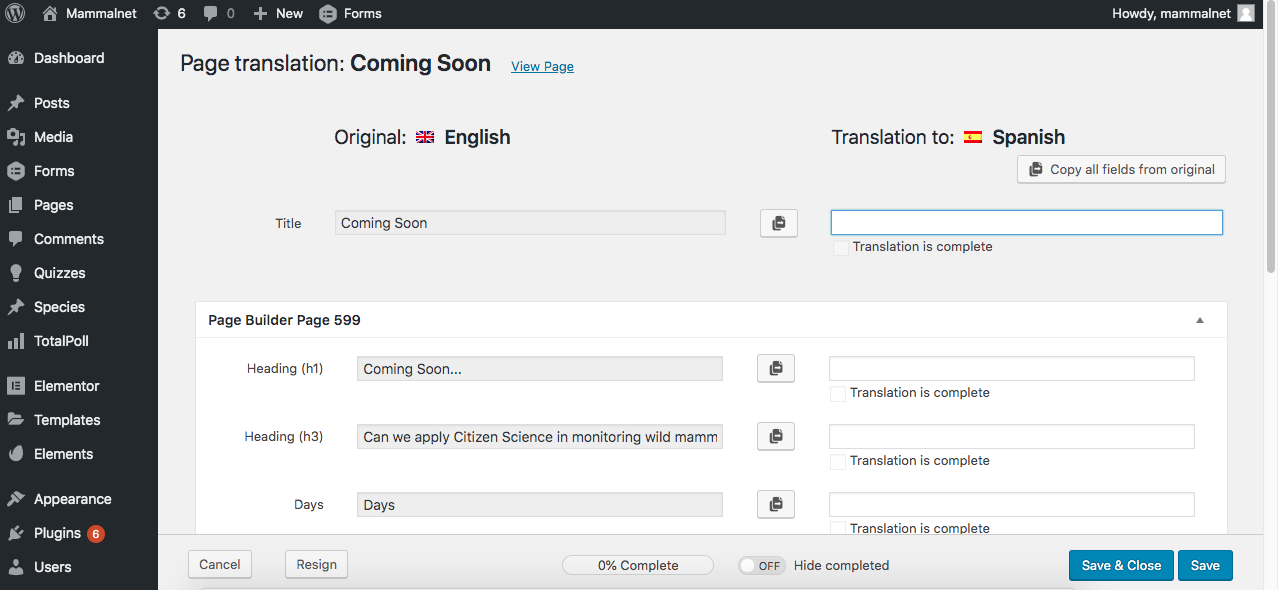
Once we click there, we’ll get the following:
We can see that on the left are the texts of the page in English and on the right, a space to fill with the equivalent translation of each sentence or paragraph. As there is nothing translated, at the bottom we can see that the translation percentage is 0%.
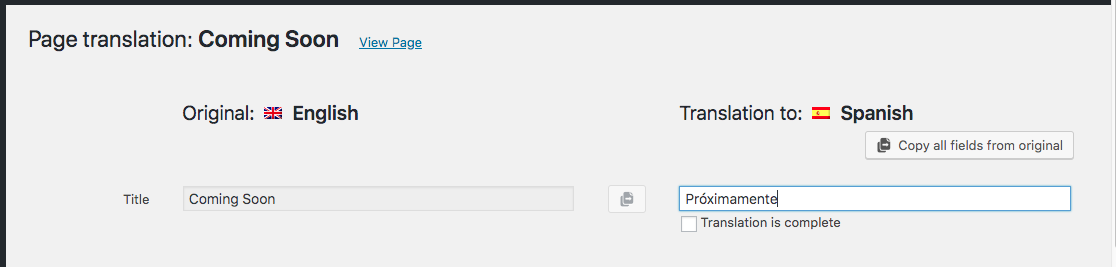
We are going to fill in the part on the right with the corresponding translation. Once we translate each sentence or paragraph inside each box, we must hit the square (tick) below, where it says Translation is complete, if we do not, it will be as if we had not translated anything.
When we hit the square, we will see that the background of the translated text will turn green, and below the translation percentage will be modified, which in this case has gone from 0% to 14%.
Let’s give Save and Close, to see what happens when we save a half-translation
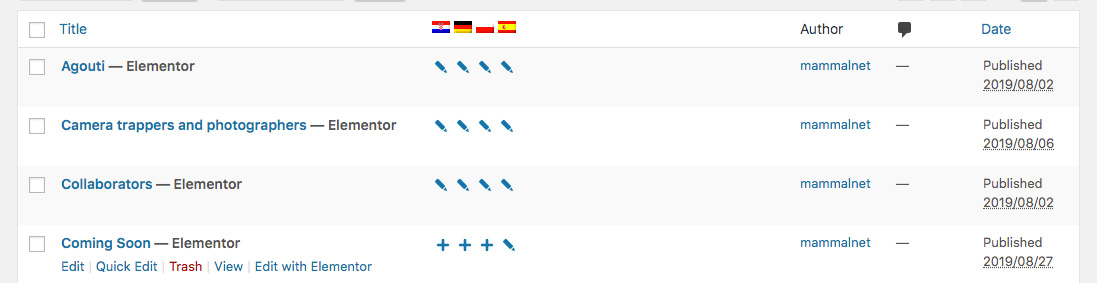
We can see that the + icon has been replaced by the gears icon. When this icon appears it means that the translation is incomplete so it will not be visible. That is why it is essential that the translation we do this at 100%, although for this, parts are kept in English. We are going to continue translating, to do so, click on the icon of the gears.
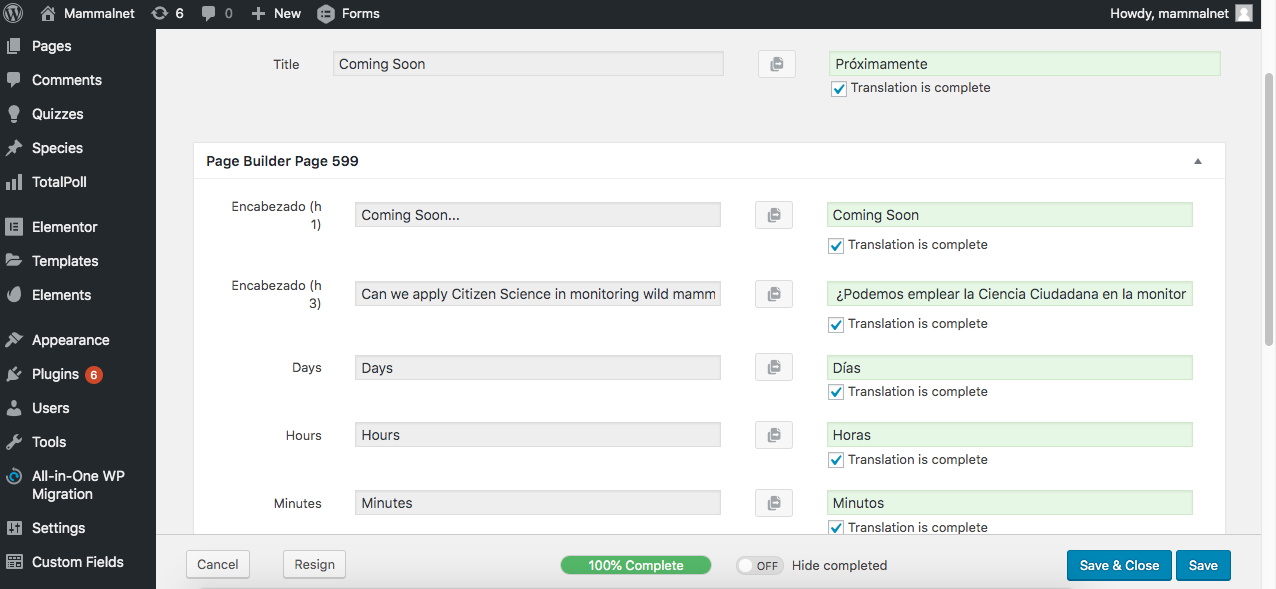
We’re going to put ourselves on the situation where there’s a lack of things to translate. It is MANDATORY that all the sections were in highlighted in green, for that reason, although we leave it in English, we have to fill it. If not, the percentage below will not reach 100% and if we save the icon will return to the gears indicating that the translation is incomplete and therefore not visible on the web. If we give it to save after completing all the fields, we will see the following:
Now let’s see what happens when we make a change in the English version.To see how to edit a page click here.
After editing the page, let’s see how our Spanish version is. To do this we go back to All Pages and the following will come out:
We can see that the icon has changed again. This new icon means that changes have been made to the English version, so check that these changes have not affected the translations. To do this, click on the new icon.
We see that everything is correct and we click again on Save & Close
Now we’ll see that our translation has the pencil icon again.
Let’s go over what each icon means:
+ : No translation, so it has to be added
gear: incomplete translation. The page translated into that language is not visible on the web
pencil: full translation. The page translated into that language is visible on the web
arrows in a circle: need to be updated. The page translated into that language is visible on the web.
4.- How to create new news
If we want to create new news or a blog entry, the first thing we need to know is whether we are going to create it for a single language or whether we intend it to be common to all four languages.
4.1.- In different languages
As with creating a multi-language page instructions, if we want to create a multi-language post, we have to make sure that we are in the English version of the website.
Once inside our Desktop, we can see a number of options in the left sidebar. If we pass the cursor over Inputs the options will be displayed All Posts, Add New, Categories y Tags.
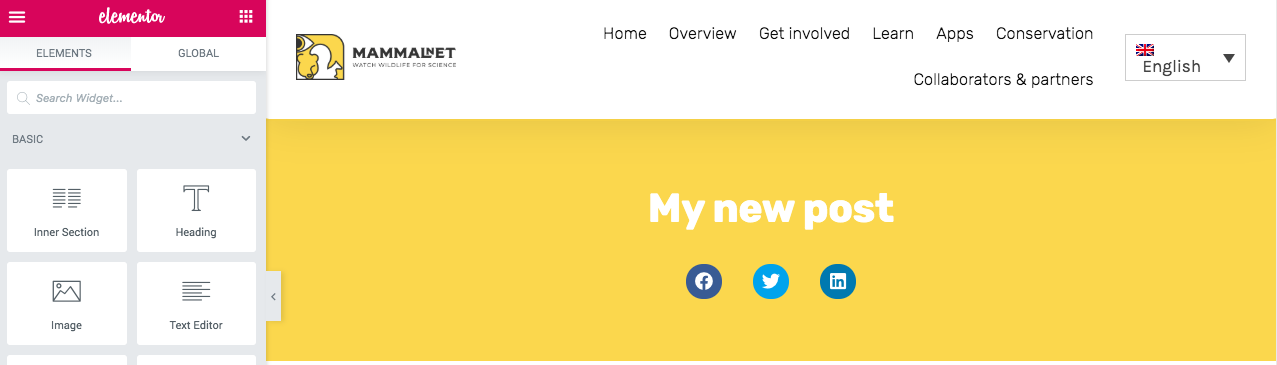
Since what we want is to Create a new entry, we select the option Add New. The following will appear:
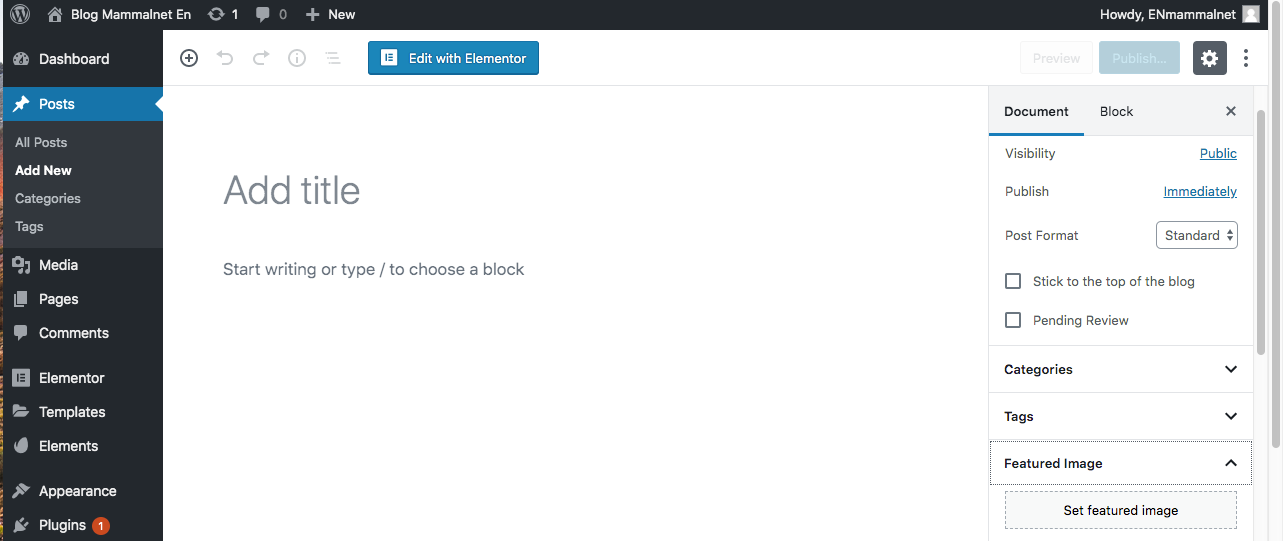
The first thing to do is to enter the title of our new entry in the top. Then, we have to choose the featured image of our news. This option is in the right panel.
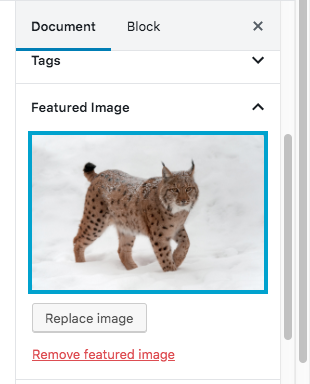
We select our featured image.
and a thumbnail of it will appear below the featured image tab.
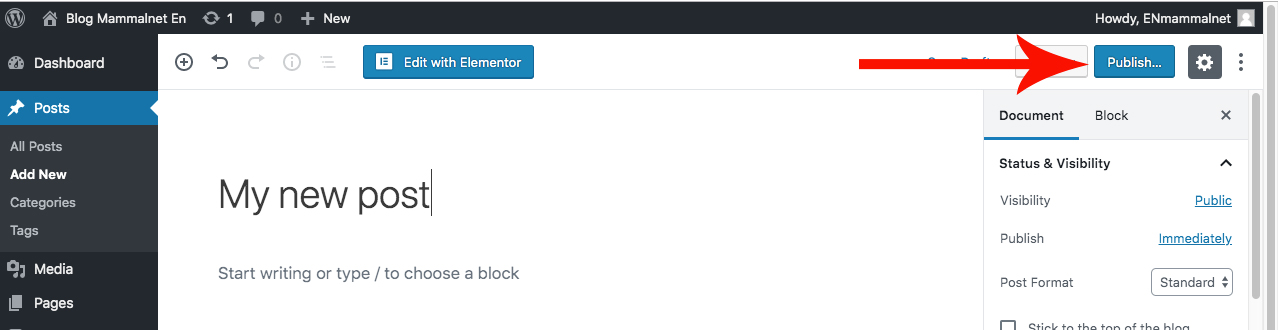
All we have to do now is to publish it, on the button at the top left.
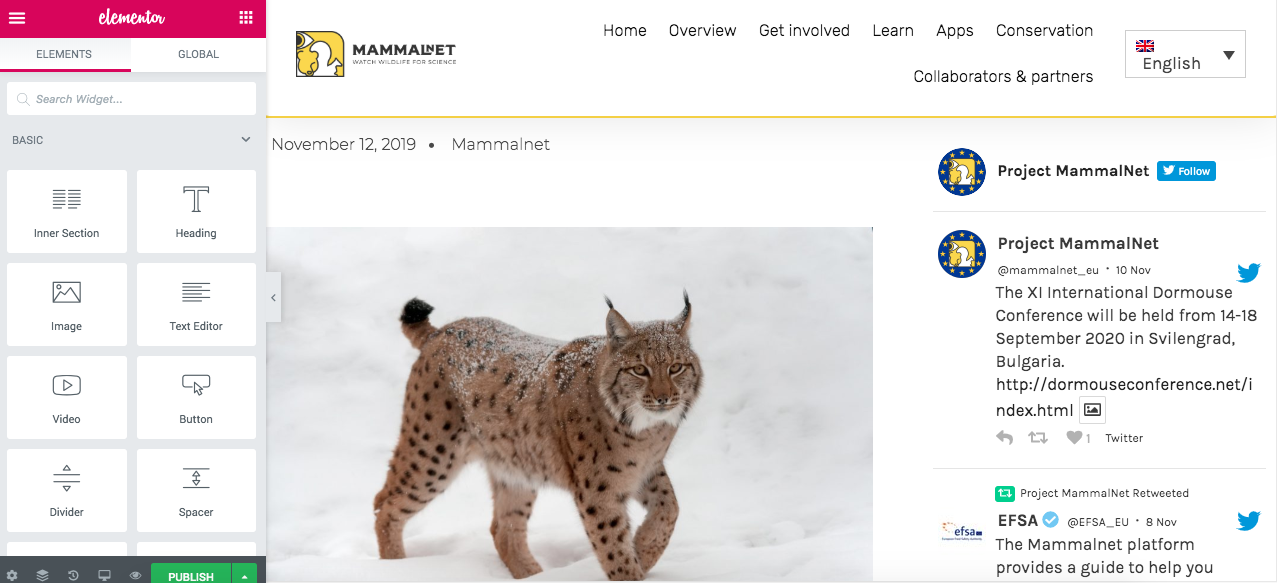
Once our page has been published, all we have left to do is Edit with Elementor. So we will click on the Edit with Elementor button. The following will appear:
The Title of the post, and the option to share it on Facebook, Twitter and Linkedin (this has nothing to do with the social network links of the page in regional languages, is an option for the person reading the post, can share it on their networks). And below that, the date of publication, the author and the Featured image. We can also see that to the right is Twitter.
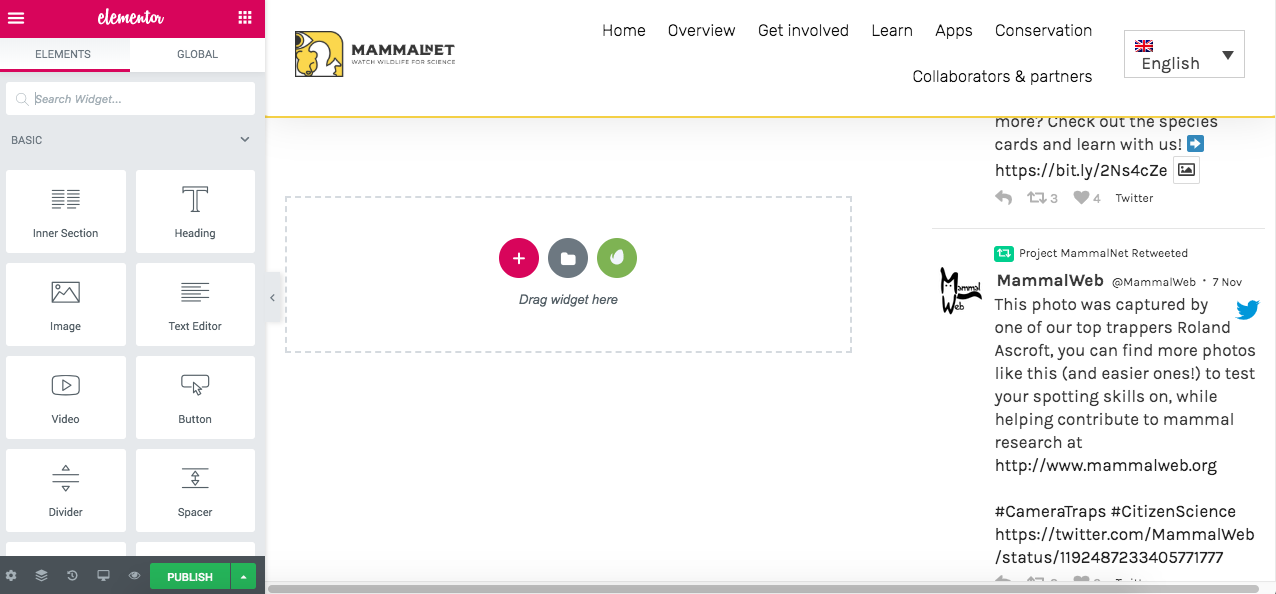
If we keep going down we’ll find the following:
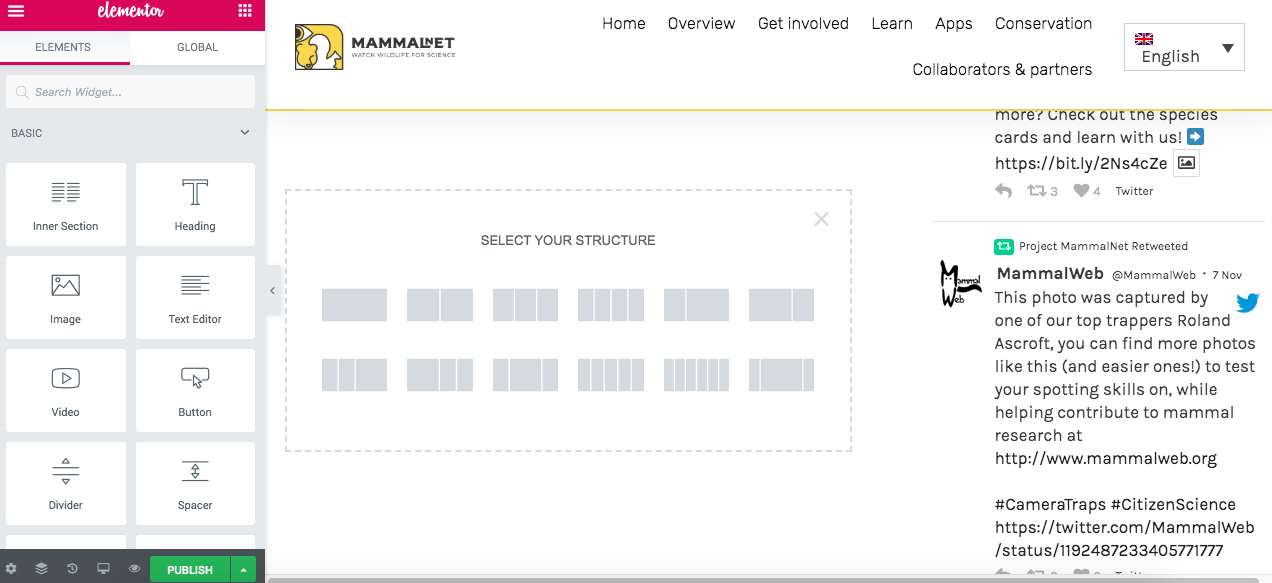
To start with our epost, the first thing we need to do is click on the + icon just below our main image. By clicking there, we will be presented with several types of structures, the most used being the first (one column) and the second (two columns).
We are going to select the first one (a column) and then we are going to look at the menu on the left, where all the elements that are going to compose our news are found.
Place the cursor on Text Editor and drag it to where we have created our column. To write, we must replace the default text that will appear editing it through the text box. (click here to see how to edit a text )
In the menu on the left you can find all the text editing options (bold, italic, underlined…). If we want to put a header on top of our text, we first have to press the button to the right of Edit Text Editor (the icon of several squares forming a square) to return to the Elementor element options.
Then, we do the same as with Text Edit, we put the cursor over Heading and drag it where we want to put it. We can change the size of the header and its alignment. We recommend that the size of the header is not less than H3.
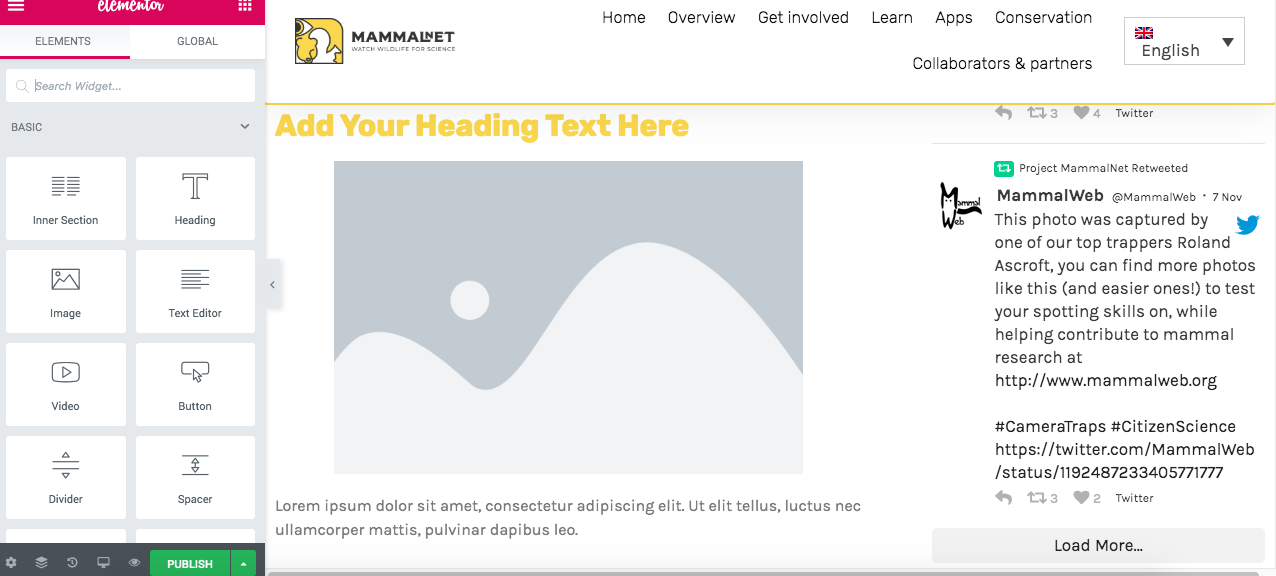
If we want to add an image, we follow the same process as before. Click on the button on the right side of Edit Heading to go back to the elements menu and select Image and then drag it where you want to put it.
To choose the image we want to put, we have to follow the same process of editing image (if you don’t remember how to edit image, click here)
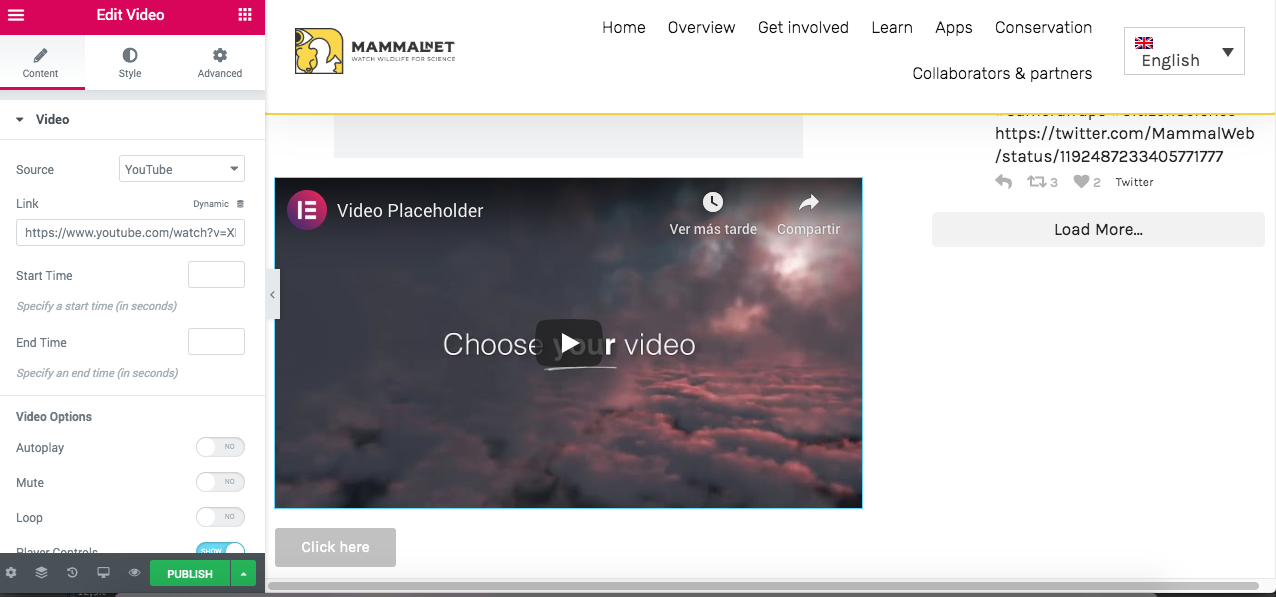
We would already have the basic elements to build our news, now we will see how to put a Button and how to put a video link.
In the image above we can see where to change the text, how to change the alignment and size of the button, as well as where to enter the link we want to be included. The type of button will change the color of it, the default color is the color of the corporate image, so it is better to leave it as is.
Finally, let’s see how to put a video in our entrance. Repeat the same process as before, click on the button to the right of Edit Text Editor and drag the Video element to the place where we want to put it inside our news.
In origin we can choose the source where our video is. The default option is Youtube, but we can see that there is the option to put the video from other platforms. Once we select the source, we must copy below the url in which our video is located.
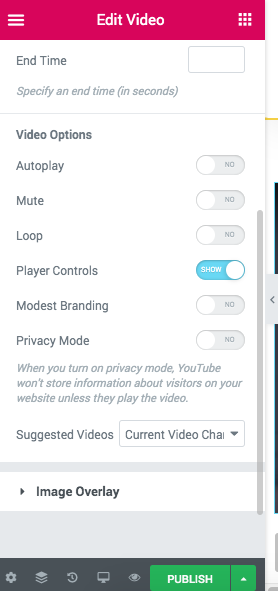
There are also several options for viewing the video, in the image above are activated those that we recommend.
For translating the post into other languages, the procedure is the same as for translating a page. If you don’t remember how to do it, click here
4.2.- In a single language
To publish a single post in one single language (in this example we will select in Spanish) that will not have any equivalence in other languages, you must give the English flag at the top.
As we can see, all the languages in which the web is displayed. Click on the one we want to create the post (in this case, Spanish)
We’ll see that now, the little flag has been changed to that of Spain.
Next, click on Posts/Add New and we will proceed to create a post that will only be seen on our Spanish page.
Si no recuerdas cómo crear una entrada, click here
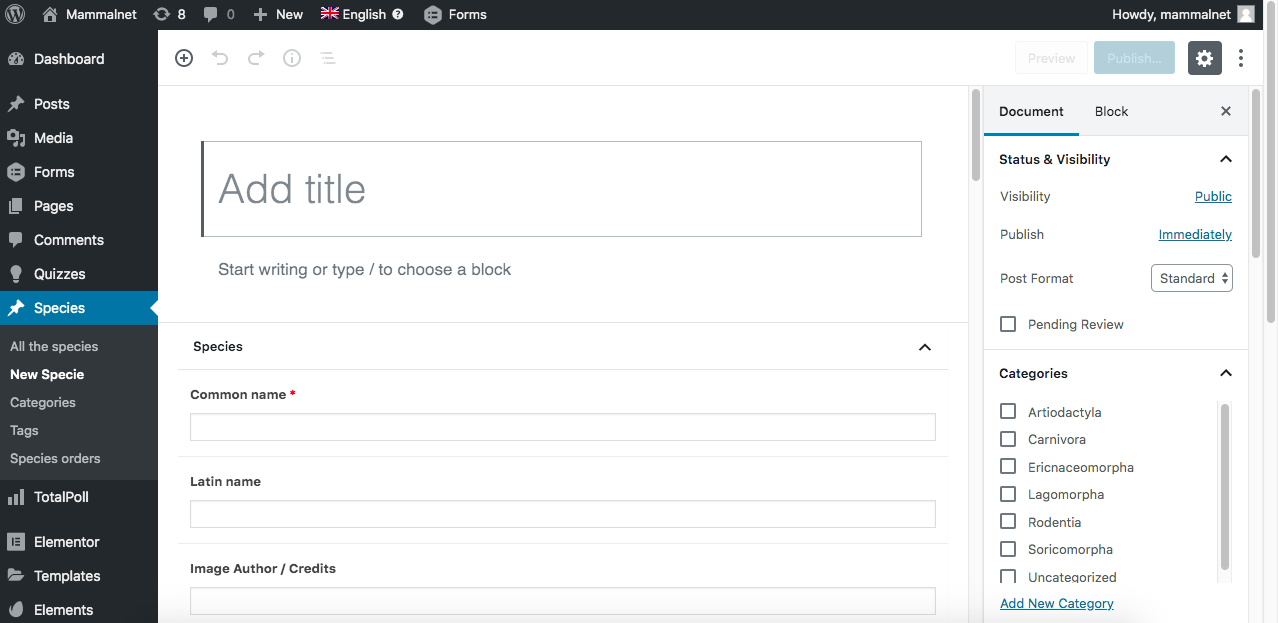
5.-How to create a species
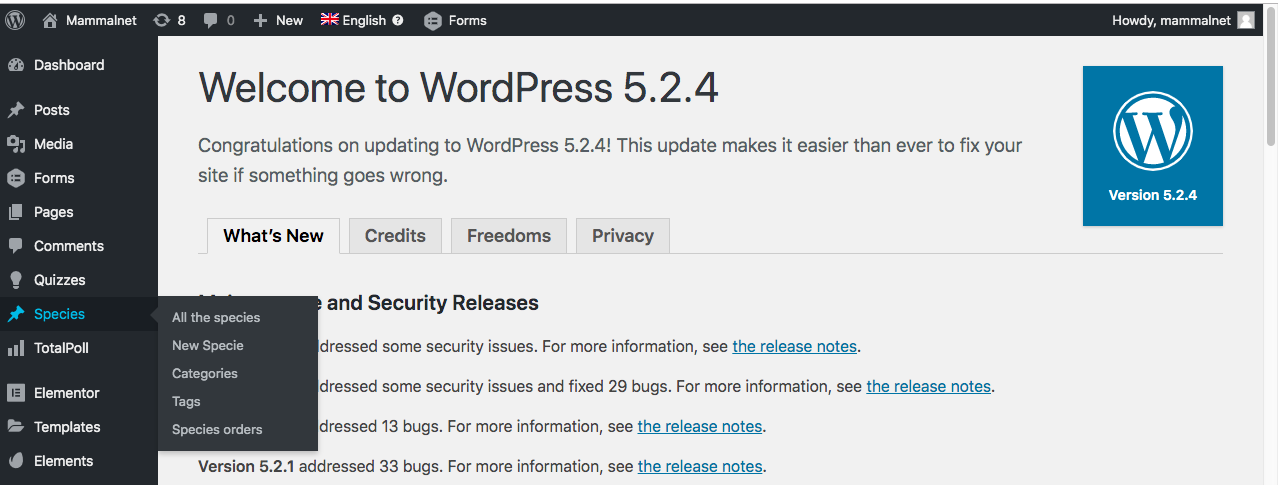
Back in our Desktop, we can see a number of options in the left sidebar. If we move the cursor over Species, we will see that several options are displayed.
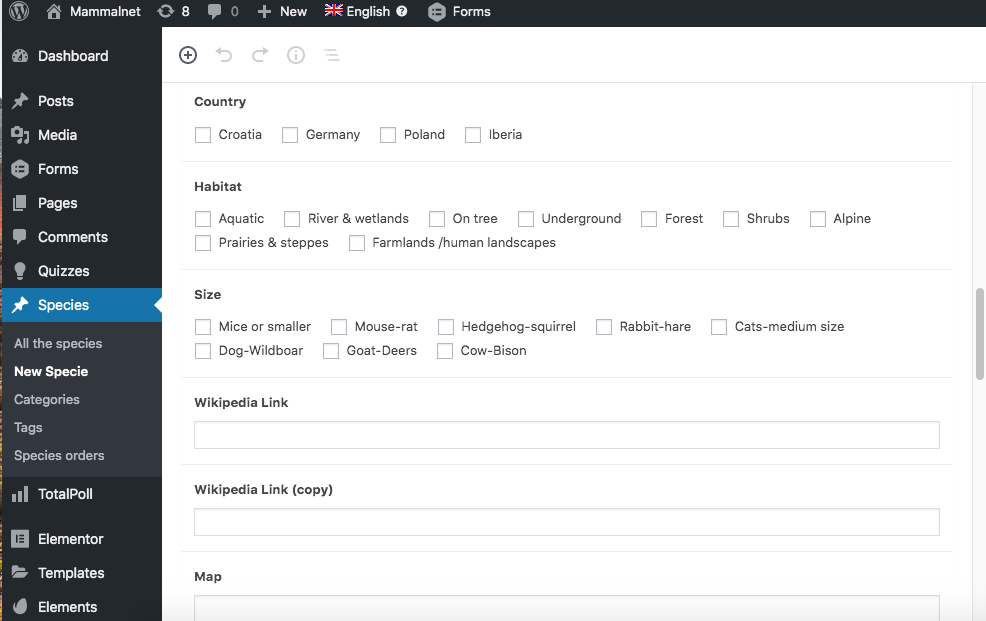
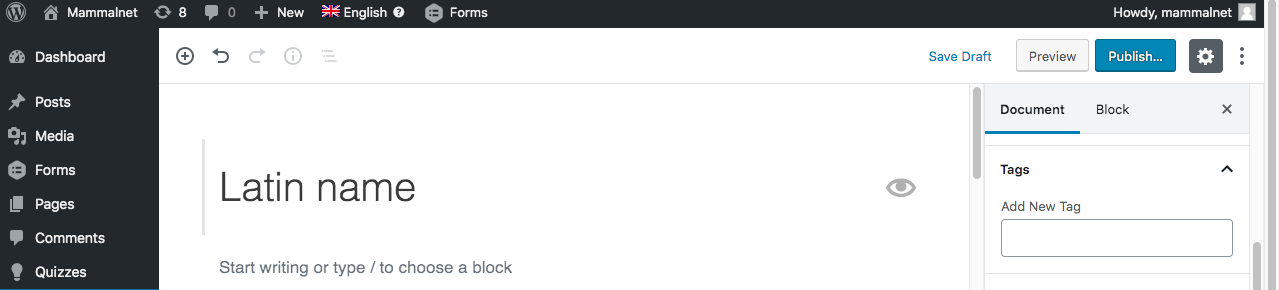
If we want to create a new one, click on New Specie and the following will appear:
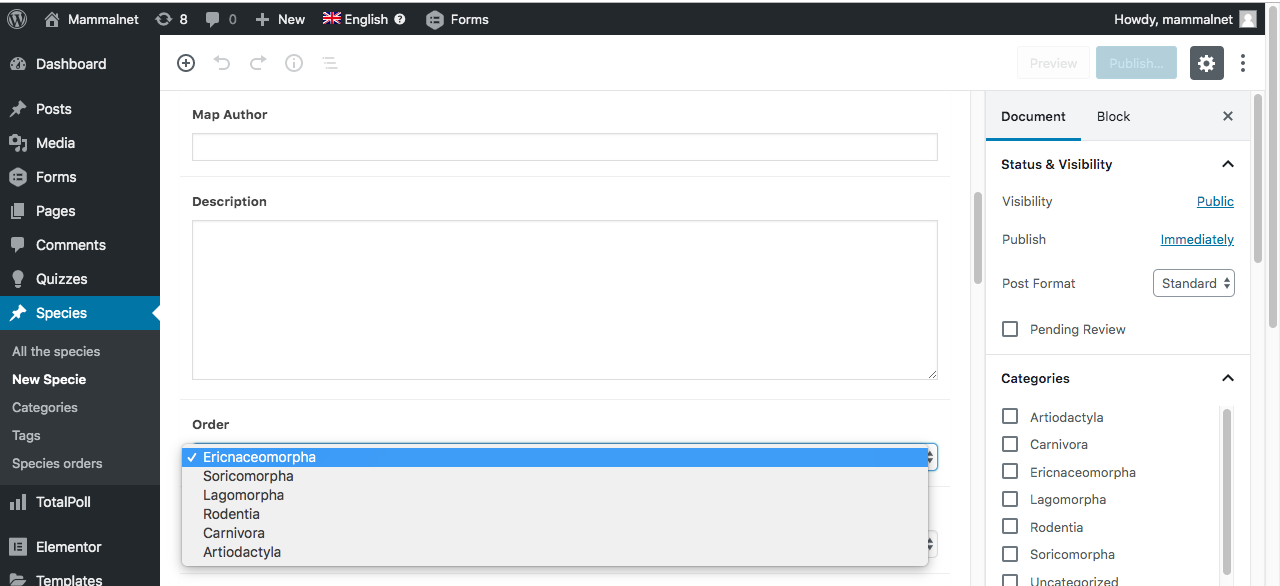
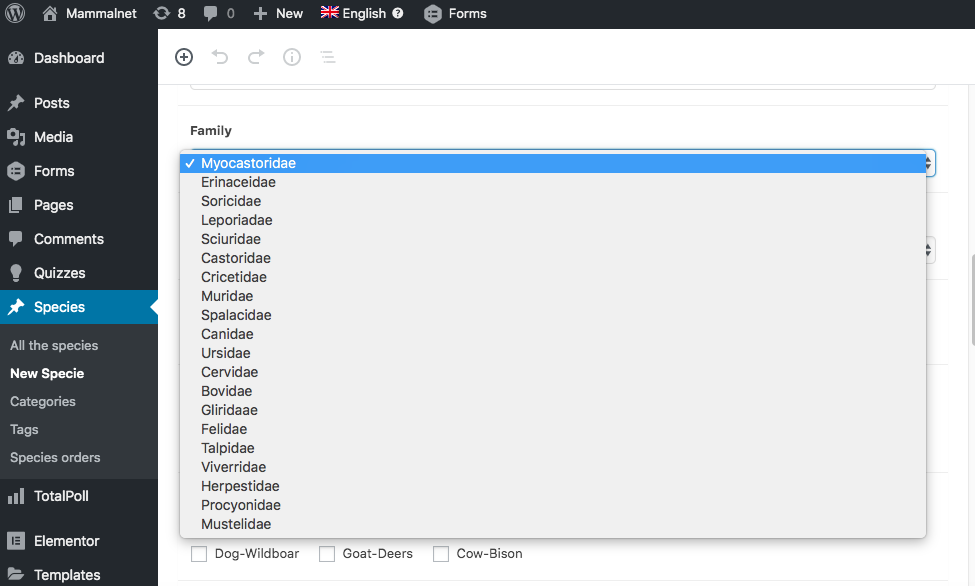
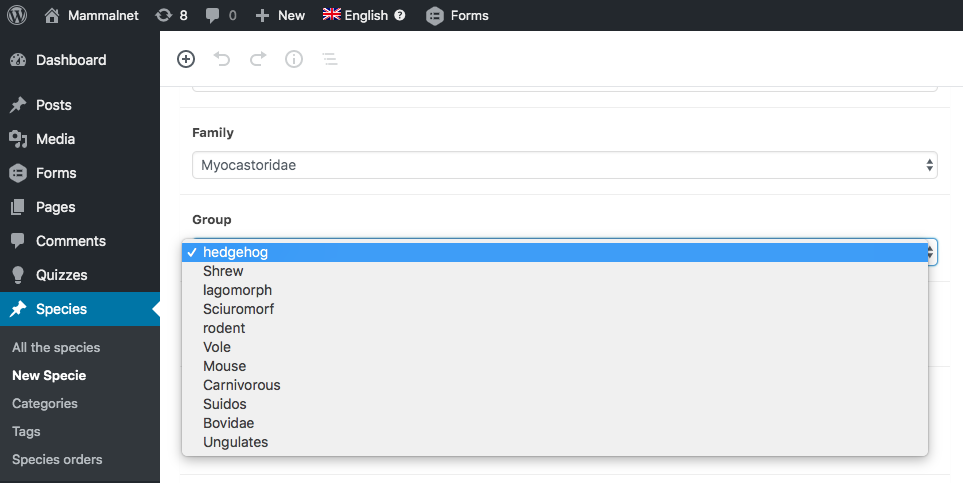
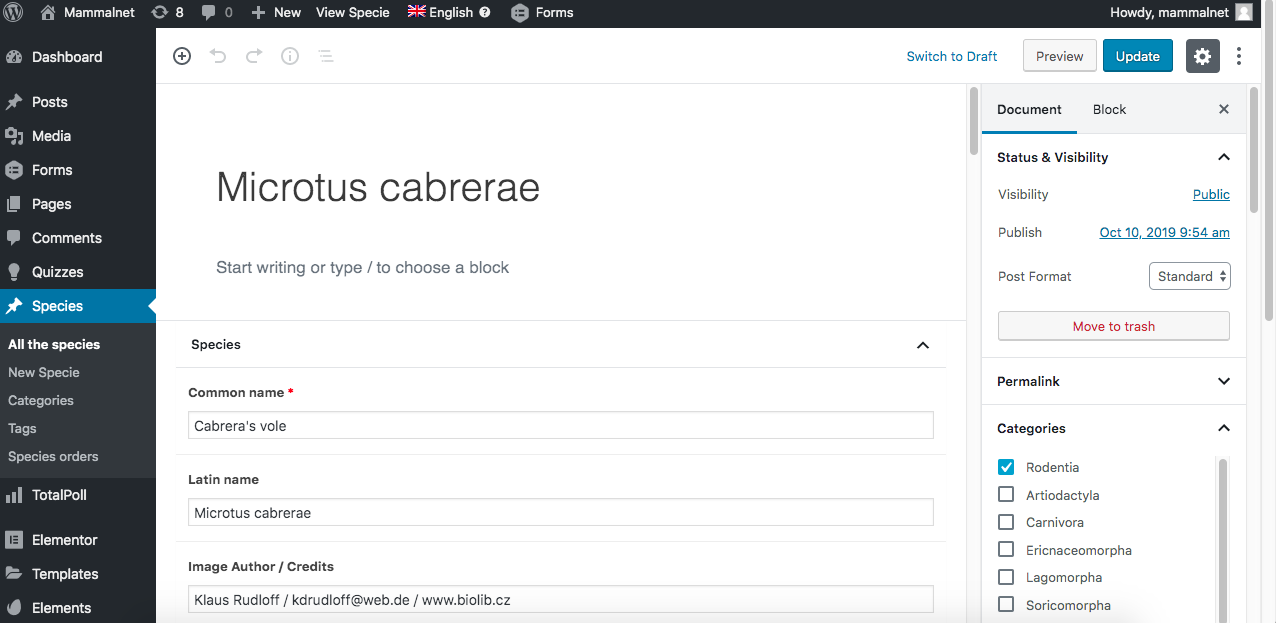
All we have to do is fill in the fields. In title, we have to put the Latin name, and we can not forget to select the category in the list on the right. If we keep going down, we will find more fields to fill.
Wikipedia Link (copy)you don’t have to fill it in and in Map you have to put the url of the map to embed it, like in Wikipedia Link
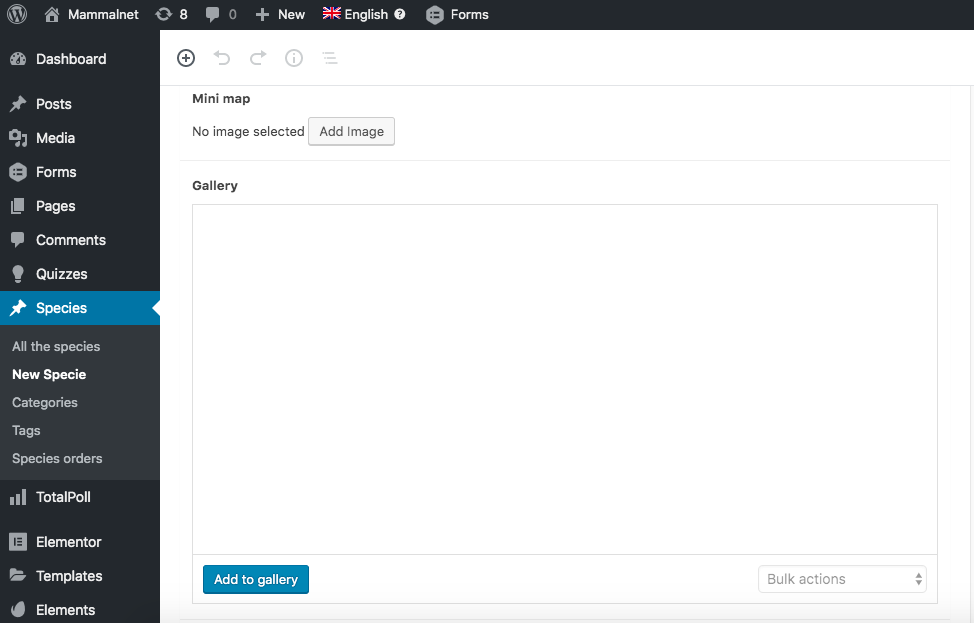
In Mini Map, we must upload the image of the minimapa and in Gallery photos would be uploaded in the case of having several photos of the mammal. Currently, there is no gallery in any kind, because we only have the main photo of the card, therefore, this field should also be left blank.
We have incorporated these fields since they were in the excel, but since they are not filled, they should also be left blank for now.
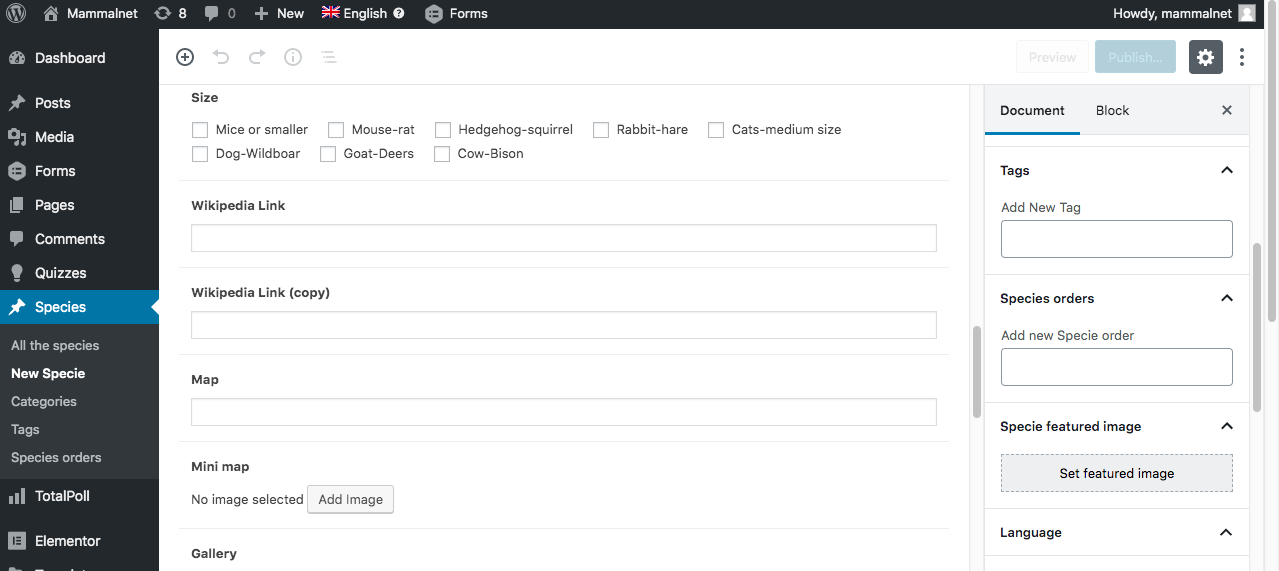
To upload the main image of the species, we must go to the right column and upload it in Set featured image. Clicking there and selecting the image we want to use.
Finally, we click on the Publish button above all, and we will have our species published in English.
IMPORTANT! It is ALWAYS necessary to create the species first in English and then translate it to the rest of languages, so it is very important that when you upload a species, you are in the English version of the web.
6.- How to edit a species
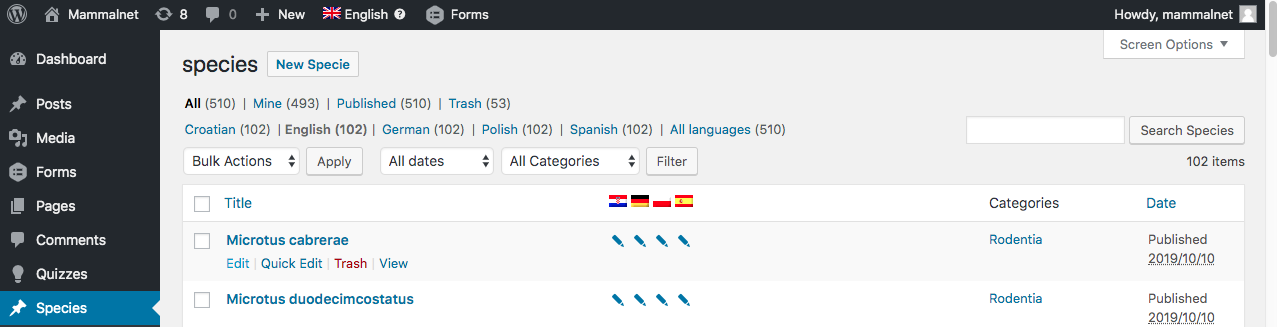
Again in our Desktop, we pass the cursor on Species and this time we click on All Species
We will see a list with all the species that we have introduced on the web. To edit any of them, we have to put the cursor on the species name we want to edit, then Edit function will appear.
Click on Edit and the following will appear:
We edit the changes in those fields we believe necessary and puss the Update button. Thus the English species version will be edited.
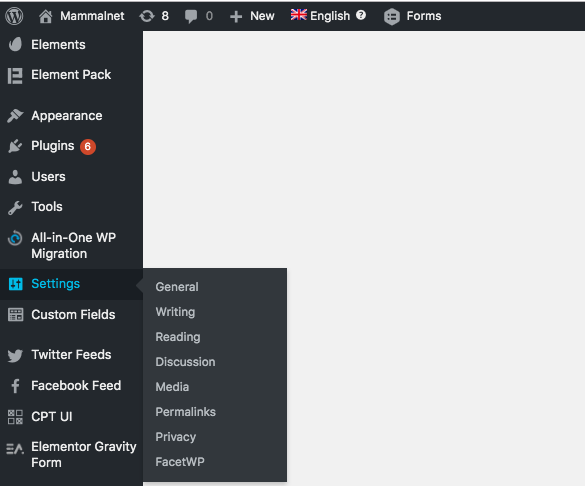
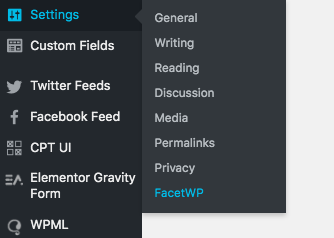
Whenever we make any change in species (create/translate/edit) so to get that the changes were visible, we must go back to the Desktop and put the cursor on Settings in the left bar.
then click on FacetWP
And in the new page that opens to us, we must click on the red button of Re-index
7.- How to translate a species or edit a translation
Back to the desktop, and click on Species/All the Species
The process to follow to translate a species is the same as the one used to translate a post or a page. To see how a page is translated or edited, click here
Whenever we make any change in species (create/translate/edit) so to get that the changes were visible, we must go back to the Desktop and put the cursor on Settings in the left ba rthen click on FacetWP, please review section 6.- How to edit a species
8.- Other doubts and questions
If there is any doubt that is not explained in this user manual, do not hesitate to contact our support team through this form. They will solve any other doubt.